Table of Contents:
- Preparing for AC Compressor Replacement
- Tools and Equipment Needed
- Steps to Remove the Old Compressor
- Installing the New Compressor
- Testing the New Compressor
- Conclusion
- Frequently Asked Questions
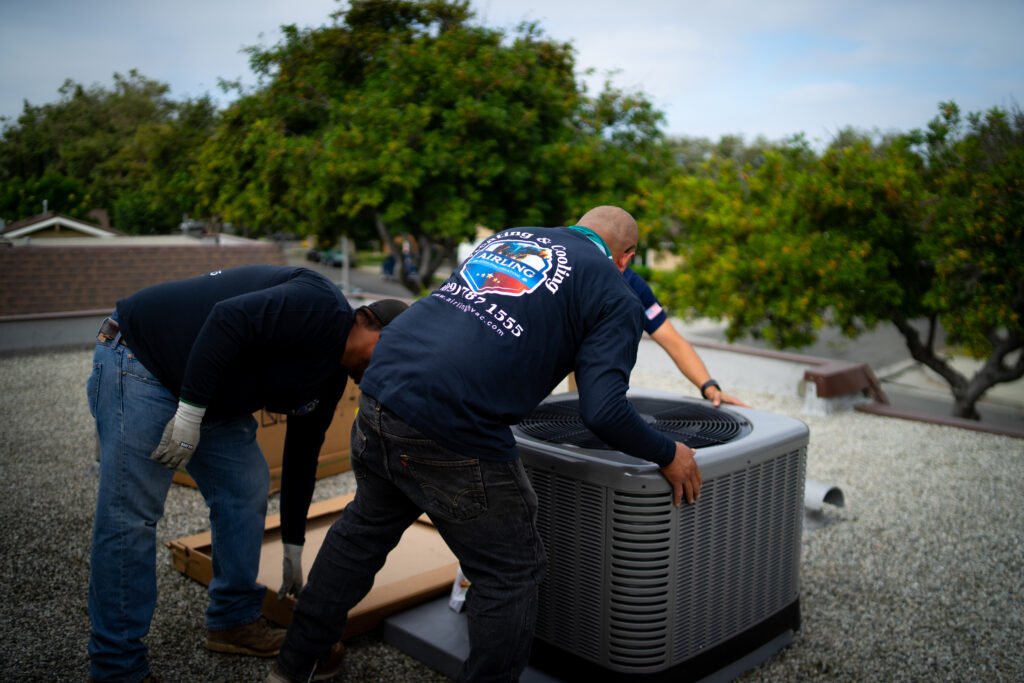
If you’re experiencing issues with your home unit, a faulty AC compressor could be the culprit. Replacing your home AC compressor may seem daunting, but with the right guidance, you can tackle this task efficiently. In this article, you’ll learn the essential steps to replace your home AC compressor, saving you time and money on professional repairs.
You’ll discover the tools needed for the job, the importance of safety precautions, and a step-by-step guide to successfully replace your AC compressor. By following these instructions, you’ll be able to restore your home’s cooling system and enjoy a comfortable indoor environment once again. Don’t let a malfunctioning AC compressor disrupt your comfort – empower yourself with the knowledge to handle this repair confidently.
Preparing for AC Compressor Replacement
Before proceeding with the replacement of your home AC compressor, it’s essential to adequately prepare for the task. By ensuring you have the necessary tools and taking the right safety precautions, you can streamline the replacement process and avoid any potential risks.
Gather the Required Tools:
- Before starting the compressor replacement, make sure you have the following tools on hand:
- Adjustable wrench
- Screwdrivers (flathead and Phillips head)
- Pliers
- Nut drivers
- Gloves
- Safety goggles
Turn Off Power:
- Locate the main electrical panel in your home and switch off the power supply to the air conditioning system. This step is crucial to prevent any electrical accidents during the replacement process.
Prepare the Work Area:
- Clear the area around the AC unit to provide ample space for maneuvering. Remove any obstacles or clutter that may impede your work during the replacement.
Safety First:
- Put on your safety goggles and gloves before you start working on the compressor. Safety is paramount when dealing with electrical components to prevent any injuries.
Check the Manual:
- Refer to the manufacturer’s manual for your AC unit to understand the specific requirements for replacing the compressor. Following the manufacturer’s guidelines can ensure a smooth and successful replacement process.
By following these preparation steps diligently, you’ll be well-equipped to proceed with confidence when replacing your home AC compressor.
Tools and Equipment Needed
To successfully replace your home AC compressor, you’ll need a set of specific tools and equipment.
Make sure you have the following items on hand before starting the replacement process:
- Adjustable wrenches: These are essential for loosening and tightening nuts and bolts of various sizes.
- Screwdrivers: Having a set of screwdrivers, including both flat-head and Phillips-head, will help you remove screws and access components inside the AC unit.
- Pliers: Pliers are handy for gripping, bending, and cutting wires during the replacement process.
- Gloves: Protect your hands with durable gloves to prevent injuries from sharp edges or hot surfaces.
- Safety goggles: Keep your eyes safe from debris and small particles while working on the AC unit.
Ensuring you have all the necessary tools and equipment before beginning the replacement will help you complete the task efficiently and safely. It’s important to be well-prepared to avoid any delays or safety hazards during the process.
Steps to Remove the Old Compressor
When replacing your home AC compressor, it’s crucial to follow a systematic process to ensure a successful outcome.
Here are the steps you need to take to remove the old compressor:
Turning off the Power
First things first, before you start working on your AC compressor, make sure to turn off the power to the unit. This step is essential for your safety and to prevent any electrical accidents.
Draining the Refrigerant
Once the power is off, you’ll need to drain the refrigerant from the system. This process requires caution and should ideally be handled by a professional to ensure proper disposal and compliance with environmental regulations.
Installing the New Compressor
To install the new compressor in your home AC unit, you’ll need to follow a precise procedure that ensures the efficient functioning of your air conditioning system. After successfully removing the old compressor and taking the necessary precautions, the installation process is the next step toward restoring your cooling system’s performance.
Here are the detailed steps to guide you through installing the new compressor:
- Secure the New Compressor: Before installing the new compressor, ensure it is compatible with your AC unit’s make and model. Check the manufacturer’s specifications and match them with the replacement compressor to guarantee a proper fit.
- Positioning the Compressor: Carefully position the new compressor in place, aligning it correctly according to the mounting points in your AC unit. Be cautious not to damage any surrounding components during this step.
- Connecting Electrical Wires: Follow the electrical wiring diagram provided by the manufacturer to connect the wires to the new compressor accurately. Ensure all connections are secure and properly insulated to prevent any electrical hazards.
- Attaching Refrigerant Lines: Attach the refrigerant lines to the new compressor, making sure they are tightly secured. Use the correct fittings and follow the recommended torque settings to prevent leaks and ensure efficient refrigerant flow.
- Securing Mounting Bolts: Securely fasten the mounting bolts of the compressor to the base of the AC unit. Use the appropriate tools to tighten the bolts and ensure the compressor is firmly in place.
- Replacing Access Panels: Once the new compressor is correctly installed, replace any access panels or covers that were removed during the replacement process. Ensure all panels are securely fastened to prevent air leaks and maintain the efficiency of the system.
By following these steps diligently, you can install the new compressor in your home AC unit effectively. Proper installation is crucial for the optimal performance of your air conditioning system, ensuring that you can enjoy a comfortable indoor environment without the disruptions caused by a faulty compressor.
Testing the New Compressor
Now that you’ve successfully installed the new compressor in your home AC unit, it’s crucial to test its functionality before sealing everything up. Testing the new compressor ensures that everything is properly connected, and the system will work efficiently once turned on.
To test the new compressor, follow these steps:
- Power Supply Check: Before turning on the AC unit, double-check that the power supply is still switched off. It’s essential to avoid any electrical mishaps during the testing phase.
- System Start-up: Turn on the power supply to the AC unit and switch on the thermostat to activate the cooling or heating mode. Listen for any unusual sounds coming from the compressor.
- Airflow Evaluation: Check the airflow from the vents in your home to ensure that the new compressor is circulating air correctly. The airflow should feel strong and consistent.
- Temperature Adjustment: Adjust the thermostat settings to different temperatures to test if the compressor responds accordingly. The air coming out of the vents should match the temperature set on the thermostat.
- Run Time Observation: Let the AC unit run for a reasonable amount of time to observe how the new compressor performs under continuous operation. Monitor if the system maintains the desired temperature in your home.
By following these testing steps, you can ensure that the new compressor is functioning correctly and that your AC unit is ready to keep your home comfortable. If you notice any issues during the testing process, it’s advisable to consult a professional HVAC technician for further inspection and assistance.
Conclusion
You now have a comprehensive understanding of how to replace your home AC compressor efficiently. By following the detailed guide provided in this article, you can tackle this common issue with confidence. Remember to prioritize safety, use the necessary tools, and refer to the manufacturer’s manual for specific instructions.
Taking control of this repair process can save you time and money while ensuring a comfortable indoor environment. Don’t hesitate to test the new compressor thoroughly to confirm its proper functionality. If you encounter any challenges during the process, seek assistance from a professional HVAC technician.
With these steps, you can successfully replace your home AC compressor and enjoy a well-functioning cooling system.
Frequently Asked Questions
How complex is replacing an AC compressor?
Replacing an AC compressor is challenging due to the need for HVAC technicians to handle intricate steps like removing the remaining refrigerant, disconnecting the old compressor, installing the new one, and recharging the system.
What is the cost range for an AC compressor for a house?
The cost of a home AC compressor can vary based on size:
- 1.5-ton: $800-$1,400
- 2-ton: $900-$1,500
- 2.5-ton: $1,000-$1,700
- 3-ton: $1,200-$2,000
How can I tell if my home AC compressor is faulty?
Listen for unusual noises like knocking, clicking, rumbling, or rattling when the AC unit turns on; these may indicate compressor motor issues that need attention.
Is it advisable to replace an air compressor on my own?
Seek professional advice from compressed air sales experts unless you are entirely confident in your ability to replace the air compressor accurately.
Do I need to evacuate the AC system before changing the compressor?
Yes, it is crucial to have a professional evacuate the AC system before replacing the compressor to ensure safe refrigerant removal and compliance with environmental regulations.